
Skip to content
Setup & Help · Android child

Set up an Android child

This guide is for when your child’s device is Android. It works whether you, the parent, use Android or iPhone yourself. Every screen below is the parent app, which looks and works the same on either platform.

Setting up an iPhone instead? See the iPhone setup guide.

Android setup steps

1

Add your child

From the parent app’s Home screen, tap + Add Child. Enter your child’s name and pick an avatar, then tap Add Child.

→ This takes you straight to a pairing code for their device.
✓ Your child now appears in your family
Tasks4Access Add your child screen with the avatar builder: choose Kid or Teen, Boy or Girl, a hairstyle and a skin tone, with a live preview of the avatar
2

Get a pairing code

The Connect device screen shows a 6-digit pairing code and who it’s for. You’ll enter this on your child’s device in the next step.
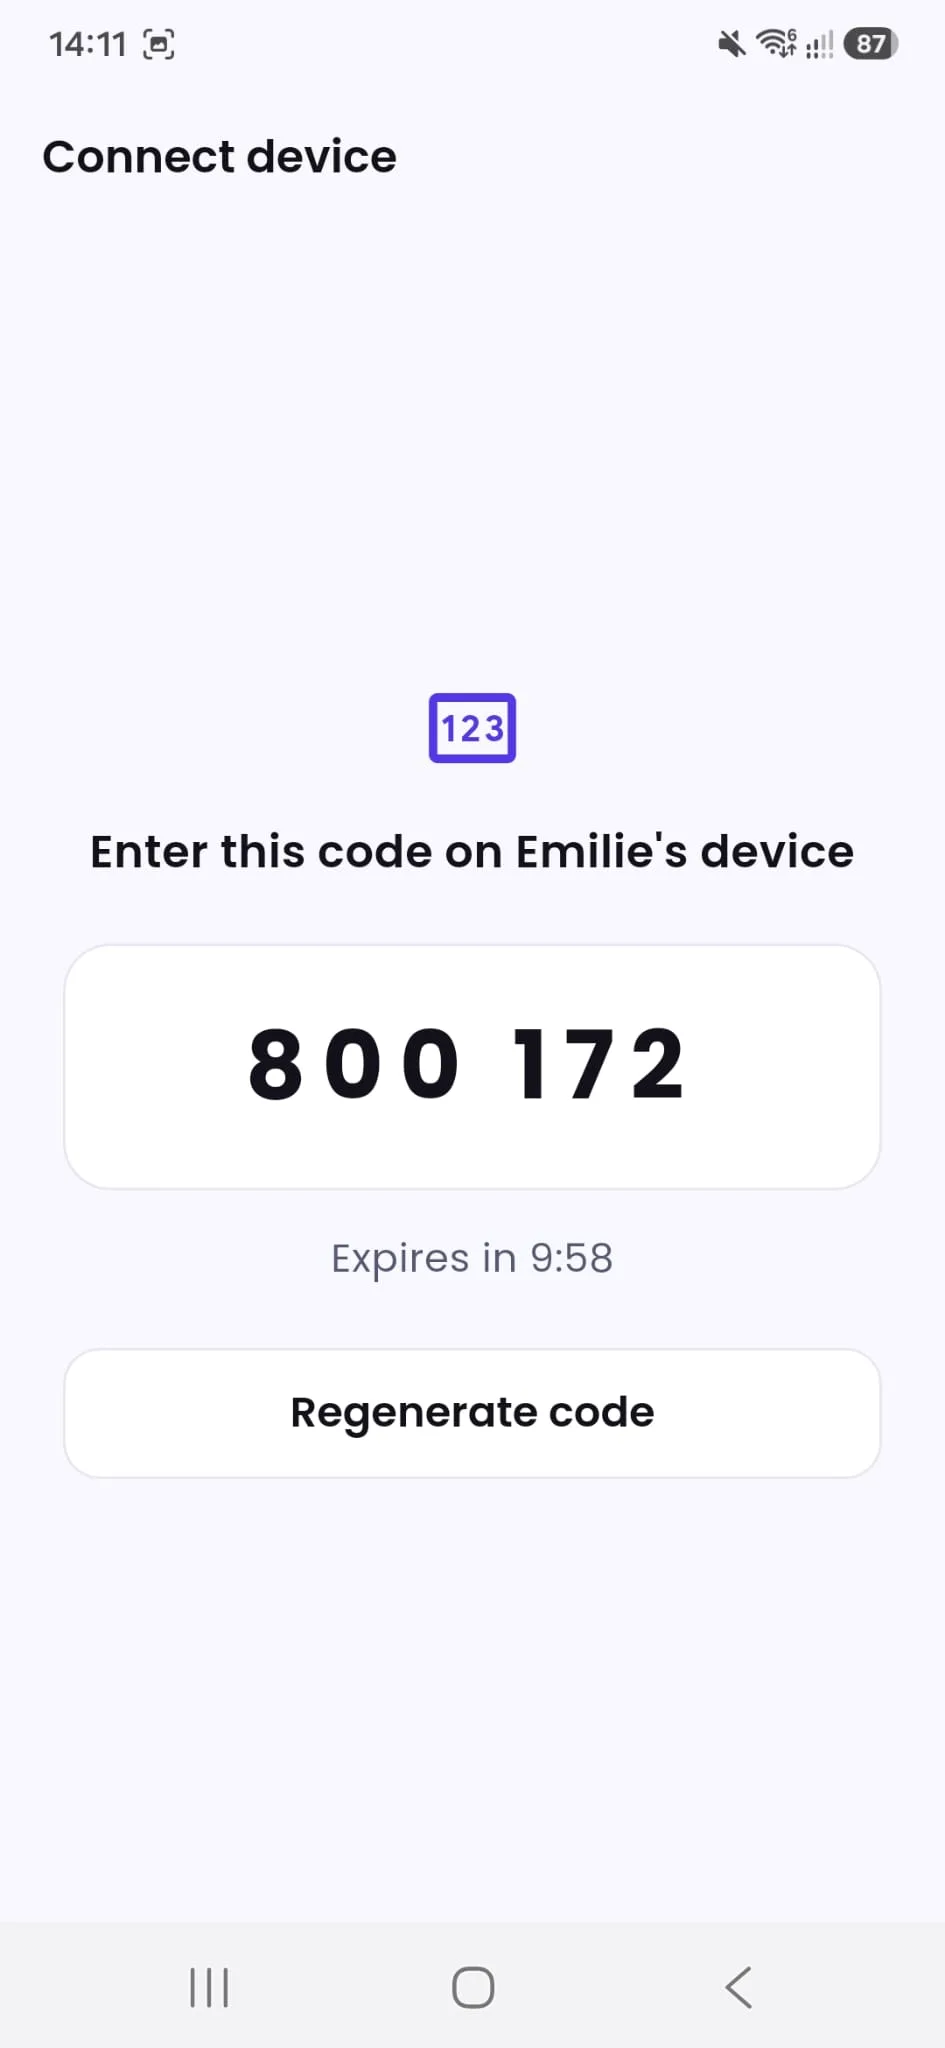
⚠ The code expires after 10 minutes. If it runs out, tap Regenerate code for a new one.
✓ You have a live 6-digit code ready to enter
Tasks4Access Connect device screen on Android showing a 6-digit pairing code, an expiry countdown, and a Regenerate code button
3

Connect your child’s device

On your child’s own Android phone, install Tasks4Access and open it. On the first screen, tap the Connect this device tile, then tap Continue, enter the 6-digit pairing code from step 2 and tap Connect.

→ Your child’s screen confirms “You’re connected,” and your own parent screen updates to show the device is linked.
✓ “You’re connected” shows on your child’s device
Tasks4Access You're connected, Daniel! screen on Android, shown on the child's device right after pairing
4

Turn on protection

Your child’s device explains how Tasks4Access works, then reaches Set up protection. This asks for Android’s Accessibility permission, used only to detect which app is currently open, so a locked one can show Tasks4Access’s own lock screen instead. It never reads message content.

Tick “I understand what this permission accesses, uses and stores”, then tap Open Settings. This opens Android’s real permission screen; turn the toggle On, then return to Tasks4Access. Once protection is on, the app also offers an optional Extra protection step that makes Tasks4Access harder to uninstall without your permission; you can skip it.

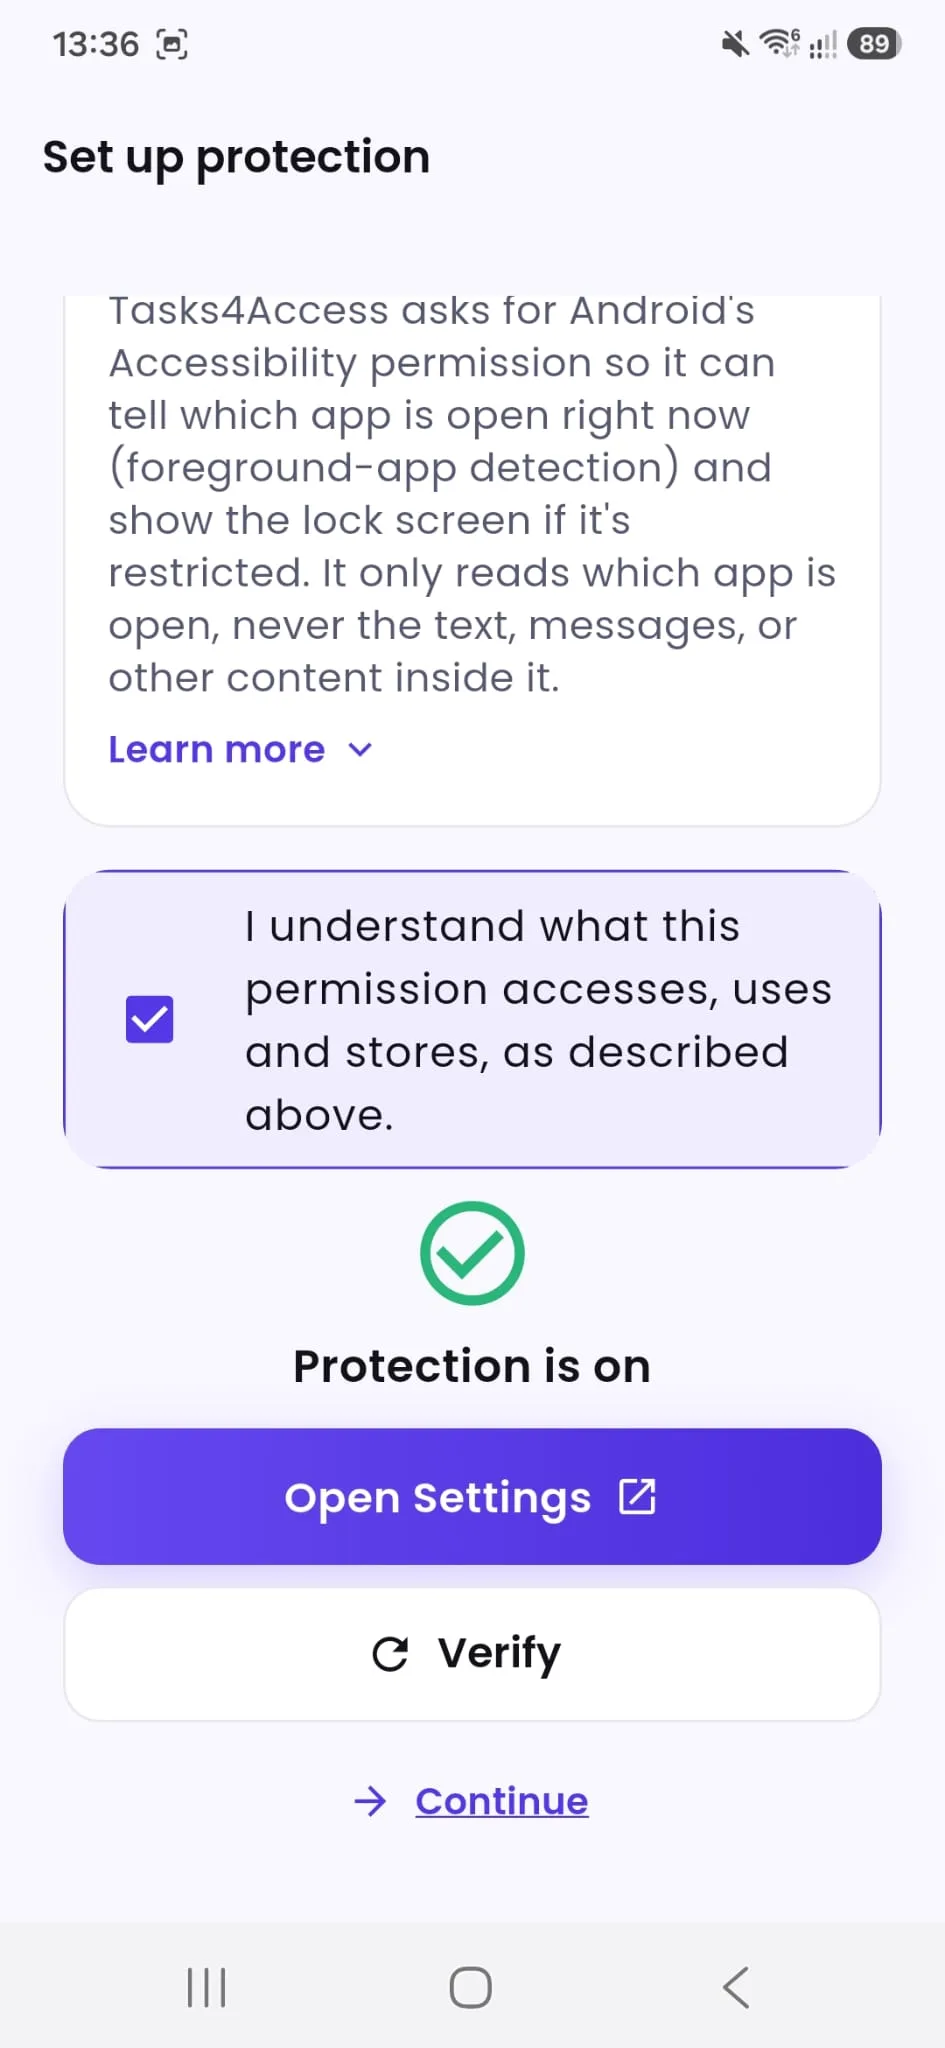
→ The screen updates to “Protection is on” once Android confirms the permission.
✓ The screen reads “Protection is on”
Tasks4Access welcome tour, step 1 of 7: how Tasks4Access works. You set a task, your child does it, you approve, and their apps unlock
Tasks4Access Set up protection screen on Android with the Accessibility permission explained, the confirmation checkbox ticked, and Protection is on shown
5

Create your child’s first task

Back in the parent app, open Create & Assign, choose your child, and add one or more apps under Apps to restrict. Choose Timed or Permanent for how long a completed task unlocks them, then tap Create task.

→ Tap Always allow under any app you never want locked, such as messaging or location apps. On Android, any installed app that has a launcher icon can be picked directly, with no separate app enrolment step like on iPhone.
✓ The task appears on your child’s device, and the app(s) it restricts are now locked
Tasks4Access Create and Assign screen on Android with Daniel chosen, the apps to restrict set to Entertainment and Social, Permanent unlock selected, and a Create task button
Tasks4Access app picker on Android with a Select all apps button and an Always allow link under each app, for apps you never want locked such as messaging or location apps
6

What your child sees

If your child opens a restricted app before the task is done, Tasks4Access shows its own lock screen in its place, with a button back to Tasks4Access.

✓ The restricted app shows “is locked” instead of opening
Tasks4Access lock screen on Android reading Instagram is locked, with the message This app is locked until your task is approved and an Open Tasks4Access button
7

Your child submits the task

Once the task is actually done, your child taps Submit on their next task card. They can optionally attach a photo, or tap Submit without a photo.

✓ The task shows “Submitted, waiting for your review” on your dashboard
Tasks4Access Add a photo? (optional) dialog on Android when a child submits Empty Dishwasher, with Camera and Submit without a photo options
8

Review and approve

In the parent app, open Approvals. Tap the submitted task to review it, then tap Unlock Permanently (or the timed equivalent) to approve it, or Needs More Work to send it back with a short note.

✓ The task moves to your Approved list
Tasks4Access Review task screen on Android for Empty Dishwasher showing Submitted, waiting for your review, the Entertainment and Social apps, and Unlock Permanently and Needs More Work buttons
9

The app unlocks

As soon as you approve, the app or apps that task restricted become available on your child’s device, with no extra step on their end.

✓ Your child’s Home screen shows “Nothing locked right now”
Tasks4Access Home screen on Android, 5 of 5 tasks approved, Nothing locked right now, and Empty Dishwasher marked Approved

Need something else?

See how the full journey looks in the app walkthrough, check the FAQ for quick answers, or head back to Setup & Help.